maandag 7 juli 2014

Blog 9: Low light photography

It happens to us all. You get an assignment or are asked to photograph during an event. Arriving on the scene, you realize that the only available light you get is candle light. Furthermore, the room is crowded and small. You think: no problem, I will use my flash. The result: gone is the atmosphere, the front row is too light, the back row too dark. What now?

Lenses
The first thing you should make sure 
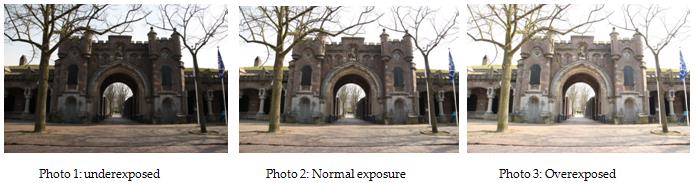
is that you always bring a “fast” lens. Fast lenses are lenses that have small aperture values (i.e. F1.4 or F1.8). The smaller the aperture value, the less light you need for a good photograph. A 50mm F1.8 will cost you around 99 euros. There is a reason why they call it the “plastic fantastic”! For the photographs in this blog, I used a Sigma 35mm F1.4 Art. Remember to use wide angle lenses instead of tele ones. The minimum shutter speed for hand shot photographs is 1/shutterspeed which means that, when a 135mm lens is used, a shutter speed of 1/135s is necessary. In contrast, when you use a 35mm lens, the minimum shutter speed only has to be 1/35s, much longer! A disadvantage ofcourse, is that you have to get close to the subject.


Figure 1: Fast lenses will save you!

ISO
Don’t hesitate to increase the ISO on you camera. Normally, I never go above ISO400 on my Full Frame camera. However, in difficult lighting situations, ISO400 is not going to cut it. Not even when using a fast lens! Most photographs in this blog were taken using ISO800 or ISO1000. Modern software is perfectly capable to reduce noise in your photographs without a significant setback in sharpness. Keep in mind that noise is more apparent in dark areas of a photograph then the lighter ones.

 
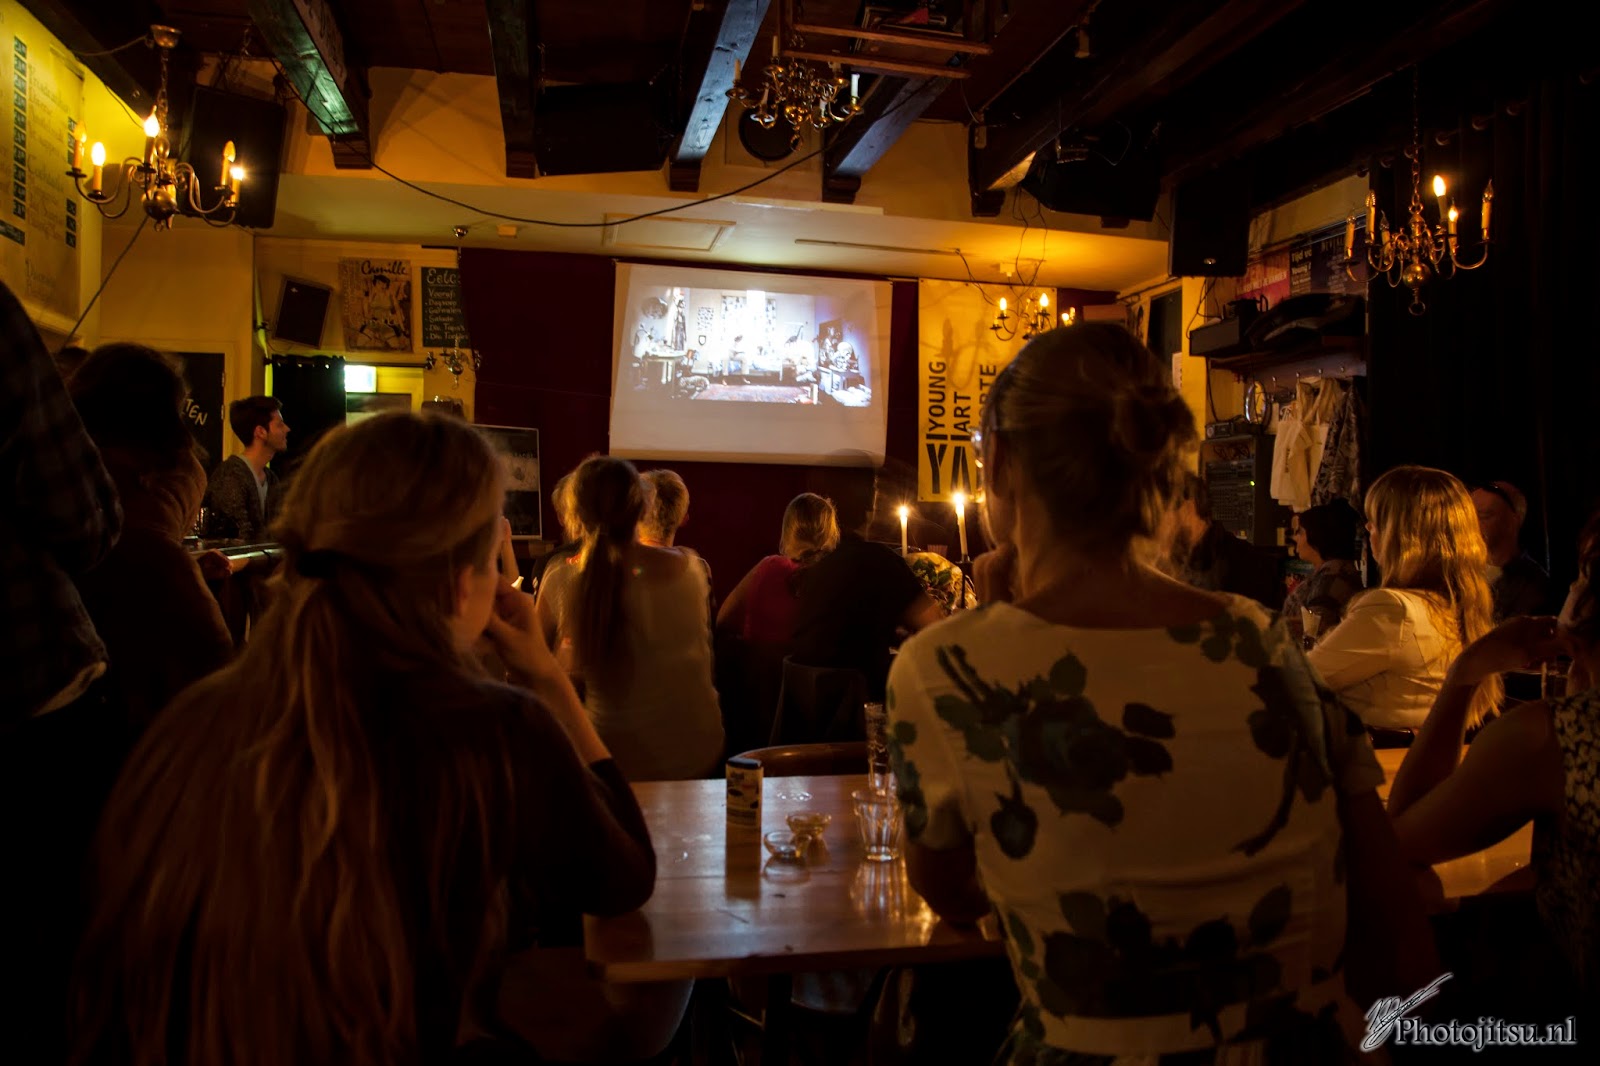
Figure 2: ISO1000, well lit parts of a photograph suffer less noise then darker parts


Focus en composition
Because you will be working with a wide open aperture, your depth of field will be narrow. Even on a 35mm lens. This means that you don’t want to try making group shots with everyone in focus. It is not going to happen! Instead, focus on the individual. Not only will this make the atmosphere seem more palpable, it will also enhance your composition because the viewer has something that stands out to look at.

Figure 3: focus on the person in the middle

Figure 4: Focus on the candle

Flash vs tripod
If you do not own a fast lens, or if you don’t want to increase your ISO value, you have to choose to use either your flash or a tripod. I strongly recommend NOT using your popup flash because you do not have control over it. It just flashes. If you own a Canon Speedlight 580 EX or equivalent, you have far greater control over the situation. Use as little flash as possible. Aim the flash towards the ceiling or, if that doesn’t give you the desired effect, behind you. This will diffuse the light and make it look softer and you will keep most of the atmosphere.

Figure 5: flash towards the ceiling. ISO200, shutter speed 1/100s

If all the above fail, you might be able to use a tripod. Using a tripod however, might be tricky since there is not always enough space. Remember you can use tables and chairs as tripods as well! In addition, using a tripod (and with it, slower shutter speeds) will result in a sharp environment but blurred people! This might be cool as an effect, but it will create a rather one sided impression of the evening!

So, to summarize:
-         -  Use fast lenses
-        -   Up your ISO value, the software will sort it out
-        -  When using a flash, make sure to aim for the ceiling or behind you
-          - Focus on the individual instead of the group (because of the wide open aperture)

Well that’s it for today. I hope you had fun reading this blog and I hope you can use these tips to your advantage!  

For more blogs, or to see my photography work, hop on over to www.photojitsu.nl or like us on Facebook www.facebook.com/photojitsu. Until next time!


maandag 7 april 2014

Blog 8: Low Key photography

Blog 8: Low key portrait photography
Hello and welcome to my newest blogpost. Today I would like to discuss “Low Key portrait photogaphy”. I reckon everybody knows what portrait photography is, but I can imagine that not everyone knows what low key means. Low key is basically shooting with insufficient lighting, bei t in the entire photograph or a part of it. I will start off with two examples of low key portrait photography and then explain how I made these photographs and how you can too!


This is example one. In this photo (yes this is me, so it’s a selfie), insufficient lighting was used to create a low key effect on the entire body. The face and the left side of my body are clearly visible while at the same time, my legs and the right side of my body has dissapeared into the blackness. This gives the photograph a very distinct look. Some might argue that it makes people look more chique or “classy”. For me, it is a great way to cover up those extra kilo’s! Ofcourse the kilo’s reappear when you switch the lights back on.. Right, moving on.


Example two. In this example, insufficient lighting was used to create a low key effect on the face. As can be seen in this photograph, the left part of the face is highlighted while the right side is lost to the shadows. The amount of face lost can be adjusted by using a reflective screen, but I will speak about that in the next part of this blog. As in any form of portrait photography, focus on the eyes is very important. People truly speak through their eyes. By the way, this slightly older, balder and leaner version of me is my brother J.


These two photographs were made in the same way. The only difference was the placing of my studioflash and the reflective screen. The easiest way for you do practice low key photography is in a dark room with the use of a single external flash and a reflective screen. If the room is dark enough, the background will not matter. However, you might want to invest in a matte black background. I usually use the following setup:


In this setup, the flash will come from your right, lighting up the face and/or body of that person. The reflective screen will cause part of the face on the dark side to show some detail as in the following example.


The reflective screen has caused this woman her eye to light up. Odd, calling my girlfriend “this woman”. Ofcourse, the intensity of the light is controlled by adjusting the power of the flash. Professional flash equipment usually has the ability to adjust the power of the flash in several steps. You will have to experiment with different light intensities to determine what works best for you. If you want to remove the detail from you dark side of your model, simply remove the reflective screen (as with my brother).


The easiest way to learn low key is just by doing. You can use any off camera flash but I strongly suggest buying one or two professional flash units as they offer more control and are more powerful. I use the Lastolite Lumen8 F400, a 400 Watt flash unit, which is sufficient for small studio’s and not more then 2 or 3 people. Needless to say, more power means more light, suitable for example for large groups of people.

Well there you have it. My 8th blogpost! I hope you enjoyed the read and if you have any further questions, don’t hasitate to ask!

Here are some more examples:


vrijdag 25 oktober 2013

Blog 7: Autumn photographing

7. Making Autumn photographs.

Hello and welcome back once again. In today’s blog I would like to cover the subject of colour change in your photograph. More specific, I would like to explain to you how you can make those autumn forests really look like autumn forests. But before I get to explaining the Photoshop tricks you will need, we will take a look at the situation.

I was born and raised in a town called Heiloo. Heiloo is a small town (approximately 22.000 people) in the Noord-Holland province of the Netherlands. As a kid, my parents often took me for a walk in the forest of Heiloo, conveniently called the HeilooĆ«r forest. This forest is hundreds of years old and got its name from back in the Germanic era when it was called “heiliger loo” which means Sacred Forest. I still love to go here. Not only for sentimental reasons but also because I think it is really beautiful there.

On to photography then. When I walk through the forest, I see all kinds of colours. I walk around with my camera and my tripod (not a lot of light in the forest because of all the trees you can find there J) and take photographs of lanes, hills (there is one, yay), people and benches. After a few hours I go home and sit behind my computer to look at the photo’s I have taken. My minds’ eye has given me all these memories of the past few hours, portraying golden forests with blood red leaves.


But when I open my photo it looks like this, and I am like: what? No, this can’t be right.. Green?! But it was all golden and red and magical!
Well sad truth is that what you perceive isn’t always what is actually there. A camera is really an honest object, it only captures what is there. So that is where Photoshop comes in handy.

Photoshop (or any other similar program I know nothing about) allows me to recreate what I have seen with my third eye from what was actually seen with my regular ones!

There is a (free) Photoshop manual on my website that explains in easy steps how to achieve this for any photo. You can find that here: http://photojitsu.nl/psguide.html.
In this blog I would like to concentrate on the picture on the left here, which is basically the same as any other photograph.
Ow well, moving on!


First we need to open the photograph in Photoshop and do the basic adjusting like local contrast and highlights. If you don’t know how to do this, please refer to the manual on my website.

After you have opened the photograph and did the basic adjustments, it is time to alter the colours. To do so, select “new adjustment layer” and then click on “hue/saturation”.
Here you will see all kinds of sliders. First thing you want to change is the settings next to the little hand with two arrows. By default this says “master”. Changing hue in master mode will change the entire picture. What you really want to do is set it to a select colour. Now most of us (including me) would assume that the colours in this photograph are mostly “greens”. However, according to PS, most colours are in the “yellows” range. So first change this setting from “master” to “yellows”.


Use the slider “hue” to change the colour of all the yellows in this photograph. I prefer to make them an intense red colour.


 After you are satisfied with the “yellows”, switch the settings to “greens”. Now adjust the greens in such a manner that they appear as the colour you want, in my case a bright yellow. After you are done, just click anywhere in the photograph to exit the layer and return to the actual photo.

When done, the photo will look a little something like this. As you can see, it is lacking a bit in the contrast department. There are two things you can do here. The first is using a simple contrast/brightness layer (found under the same menu as the hue/saturation) and up the contrast of our photograph. However, there is a second technique I want to tell your about. This technique works very well for any photo that should have a nice magical glow to it. Handily, it also adds contrast to your photos.

To create this effect, I use something called the Orton effect. The Orton effect, or simply called Orton, is a technique in which you duplicate your base layer, add a Gaussian blur and then change the setting of that copy to “overlay”. This technique is also described in my Photoshop manual.


In short: press CTRL+J to duplicate your base layer. Go to filterĆ blurĆ  Gaussian blur and apply a blur effect with a radius of approximately 40 pixels.


Press apply and set the blending option to “Overlay”.


You will notice that the photograph is way too dark and saturated. To adjust this, simply change the opacity until you find it suitable (in this case around 60%).


Your photograph should look something like this now. The colours are bright, contrast is high and it has a nice soft glow to it.

Basically we are done now, the colours and light are how I have seen this forest with my third eye. However, I felt like there was something missing.


I always like photographs like this to have some human reference in them so I decided to add just that.


I took a silhouette from a man I shot in another photograph and I added him to this one. Can you see him? The man that always walks through this forest. I have no idea who he is or what he is doing. He’s just always there, in the distance, walking..


And there you have it. I have changed a real photograph of the HeilooĆ«r forest into a photograph of the way I see the HeilooĆ«r forest.  If you have any questions regarding this blog, or one of the others (yeah, there is more! J) please feel free to contact me at info@photojitsu.nl. Like my work? Why not have a look at www.photojitsu.nl or www.facebook.com/photojitsu .


zondag 8 september 2013

Blog 6: Different lenses and their applications.


Different lenses, different applications.

Hello and welcome to my sixth blog entry. Today I would like to tell you something about different lenses and when to apply which type. Keep in mind that these are general applications. There is no one stopping you from using your lens in different fields.

Before we dive into the actual lens types, I want to tell you something about the science behind these lenses. Photography is writing with light (freely translated) and light is bound by natural laws. The most important part is the so called focal length. Light is reflected on an object and taken in by the lens on the camera. The image however, is always in reverse because of the glass that resides inside the lenses. The point where the light “crosses” is called the focal length. It is the length between that point and the sensor.


All lenses work according to this principle. In this example, a 24-105mm zoom lens was used. 


This picture shows a shorter focal length (24mm in this example).
 Because the focal length is closer to the sensor, the camera will capture “more” of the surroundings. This is what we call a wide angle lens. 


The zoom lens is able to shift the focal length from 24mm to, for example 105mm, capturing less of the surroundings and more of the object of interest. This is what we call zooming.


The amount of “zoom” is indicated on the lens. For this example, a 24-105mm zoom lens was used. This lens can vary between 24 and 105mm and everything in between, making it zoom approximately 4.5 times. Lenses that range from 18-200mm have 11x optical zoom. Keep in mind however, that lenses with a greater zoom range generally take less sharp photos (the reason why not everyone is running around with mega zoom lenses). 

Now that we have had a look at the basic physics of lenses, let’s move on to their application.

In general, there are four basic categories in which we can divide lenses. They are:

- Prime lenses

- Wide angle lenses

- Standard zoom lenses

- Tele/supertele lenses

All these types of lenses have their own general application. I will discuss each and every type in this blog. There are some other lenses on the market, like fisheye lenses, tilt-shift lenses and lenses with adjustable depth of field like Lensbaby. I will not discuss these lenses in this blog but might do so in the future.

Prime lenses

The first category is lenses with a fixed focal length. In normal language this means that the lens is not capable of zooming. 

In the photo on the left you can see one of these prime lenses, the Canon EF 50mm F1.4. The pros of these lenses are the unsurpassed image quality, speed and autofocus speed. Primes are usually fast, which means they have small F values (like the 1.4 on the photo). Smaller F values mean more light entering the lens and reaching the sensor. The actual application is determined by the focal length, depicted as the amount of mm on the lens. A 24 mm lens is mainly used in landscape or street photography. A 50mm lens is mostly seen as the standard lens (because our eyes operate at approximately 50mm). At 50mm your camera sees what you see, making it suitable for almost anything! The larger focal lengths, i.e. 85mm, 100mm etc are mostly used for portrait photography and macro photography. 
Needless to say, the biggest con of this lens is the inability to zoom. If you change application, you have to change the lens.


This photo was taken at night, without the use of a tripod, using the speed (F1.4) of the 50mm F1.4 prime, a 1/100s shutter speed at ISO 400. The depth of field and shutter speed would not have been possible without the speed of this lens. I love it!


Summary for prime lenses:

- Unsurpassed image quality, speed and autofocus speed

- Application is determined by focal length

- No zoom means changing lenses when switching objects

Wide angle lenses

Wide angle lenses have a short focal length. The wide angle lenses range from approximately 10 to 40mm. Because of the short focal length, the lens will capture more of the surroundings (as in the example). This makes wide angle lenses the preferred choice for landscape- and street photography.


For landscape photography, the speed of the lens is unimportant. Landscape photographers usually aim to capture the entire landscape in one sharp image. This means that a high F value is required (i.e. F22). For street photography, the speed is more important, especially when shooting indoors. Think train stations, subways, bars, restaurants, dense urban locations etc. Because of their nature, wide angle lenses tend to cause barrel distortion. Barrel distortion is where the outer corners of the image are bent, like a barrel. Be careful around butts and thighs, they will look bigger than they actually are!


This photo was taken using a 16-35mm lens at F8. Without the short focal length, I would never have been able to capture so much of the sea, since I was standing a few meters away from it! I used the F8 to make sure the beach and water were sharp.


Summary for wide angle lenses:

- Short focal length (approximately 10 to 35mm).

- Used in landscape, street and architecture photography.

- Speed is unimportant for landscape or architecture photography, but more so for street photography.

- Be careful with barrel distortion. People may look bigger than they are.


Standard zoom lenses

The next category is the so called standard zoom lenses. Standard zoom means the range between approximately 50mm and 105mm. The lenses that utilize the standard zoom range however, mostly also cover a part of the wide angle range. Therefore, these are the most versatile lenses one can own. 

For example, I own the Canon EF 24-105L F4 (see photo).

This lens allows me to capture landscapes (wide angle) and make portraits (standard zoom) and everything in between, while still maintaining great optical quality and autofocus speed. When using one of these lenses, you hardly have to take if off the body.

Standard zoom lenses like this one are best to take on a holiday when you don’t want to carry different lenses with you. Albeit not having the large zoom range of an 18-200 lens, the image quality is far superior. As for the speed, 18-200 lenses usually slow down considerably when zoomed in. For example, one of those lenses might be able to reach F3.5 on 18mm but slows down to F5.6 when zoomed above 120mm. This 24-105mm has F4 across the entire range. This is my most used lens!


This photo was taken on the NDSM wharf in Amsterdam. The 24mm allowed me to capture the entire sculpture.


This photo was taken using the same lens as the Amdock photo. Because of the 105mm, this lens is also suitable for portrait photography.


Summary for standard zoom lenses:

- Versatile lenses because of both wide angle and standard zoom ranges

- Most standard zoom lenses remain fast even when zooming

- Almost no changing of lenses because of wide application


Tele/supertele lenses
The last category is the tele/supertele lenses. These lenses are usually very long and range from approximately 120mm to 1700mm. The biggest supertele is a whopping 5200mm (it is really a prime)! 


This photo shows a supertele lens on the body of a Nikon camera.
Tele and supertele lenses are mostly used for animal photography, sports photography and voyeurism.
Because of its large focal length, images lose depth and there is no real distinction between object and background. They do allow you to take that photo of a lion in Africa, or the winning goal of your favorite soccer player while standing on the sideline. 


This photo was taken using a 70-200mm lens on F4 during a visit of a zoo in Alphen aan de Rijn. The bird was pretty far away so I had to use the full 200mm to get a crop of its head. Because of the F4, the background got nice and blurry (we call this effect Bokeh).


Summary for tele/supertele lenses:

- Mostly large, expensive and heavy lenses

- Used in animal- and sports photography

- Allows you to “snipe” shy animals and winning goal scoring soccer players

Well this concludes my blog on different lenses and their application. Like I said in the intro, this blog describes general applications. Of course you can use a supertele for landscape photography, or a wide angle lens for portraits. You might get some surprising results!

If you have any questions, suggestions, complaints or compliments, please contact me at info@photojitsu.nl.

Also, come visit me at www.photojitsu.nl, www.facebook.com/photojitsu and follow me on Twitter @photojitsu_nl.

Thanks for reading!
Maarten Kuiper
owner of Photojitsu.nl

maandag 5 augustus 2013

Blog 5: Landscape photography

Blog 5: Tips and tricks for landscape photography.

Hello again, and welcome to our fifth blog entry. This time I would like to shed some light on challenges you might encounter when practicing landscape photography. Landscape photography might seem like an easy practice. The landscape is there, it doesn’t move, it isn’t on a tight schedule and you can take all the time in the world to set up your camera for that perfect shot. You press the shutter and *click* the scenery doesn’t look anything like its real counterpart. So what is it that makes landscape photography so difficult?

3D vs 2D vs depth

First of all, always remember that the world is built in 3D (x, y and z axis) and your photo is a 2D reconstruction of that world (only x and y axis).


Picture 1: 3D vs 2D

A mountain might seem incredibly vast and intimidating in real life, but make a picture of it and it seems flat. That is because there is no z axis! In order to create a sense of distance in our photos, and to bring back a visual rendition of the z-axis, it is really important to not only focus on the background, but on the foreground as well.

In this example (photo 1), the photographer took a small part of the beach and some rocks as a reference point for viewers. This creates a virtual z-axis for the viewer. You get a sense of depth in the photo.


Photo 1: foreground in landscape photography.

Now if you place your fingers over the big rocks (do it!) and look at the right side of the photo, you will lose the z axis and with that the sense of depth.

Photo 2 is a good example of another problem with landscape photography.


Photo 2: angle of the photo is important

In this photo, I have created a sense of depth by adding something in the foreground. However, the viewer has no idea how high that waterfall is (and it was pretty high). The problem with this photo is its angle. This photo was taken high off the ground. If you want to express the vastness of something, you can do two things. First, you can shift the angle and lower your camera. This works well for any photo. However, it is not always possible to reach the ground (as in this example).

 The second thing you can do to improve the sense of vastness is to add an object as a reference point, preferably one that is common to most people (like more people!). Photo 3 is a good example.


Photo 3: better angle, still no reference point


This is the same lake as in Photo 1, only taken at a different time of day and from a different angle. You get a better view of the lake and how vast it is. The dark line at the right side of the photo creates our Z axis. However, you still don’t get a sense of the vastness of the mountains (because of the high angle).

 To do this, I have waited for some reference points to appear. In this case, humans.


 Photo 4: Better angle and a reference point.

Photo 4 is the same as photo 3, only this time I have not edited out the reference points for our viewers. There is a man on the lake, standing on a boat, rowing towards the right. This immediately creates a sense of vastness because everybody knows the real size of a human being (well on average anyway).
  
There are two more subjects I want to discuss in this blog. The first one is the horizon. There is nothing more destructive for a landscape photo then a sloping horizon. Take some time to adjust your camera correctly. There are all sorts of handy accessories to ease this process. If, by chance, you happen to have a sloping horizon, despite all your efforts to prevent it, straighten it out using software. There is a photoshop manual on my website that tells you how to in a few easy steps (http://photojitsu.nl/psguide.html).

The last subject is the time of day. The light of the sun follows a distinctive patern during the day, use it! When the sun comes up, there is what photographers call “the blue hour”. It is one hour from the first rays of light. You can still see that it is night, the world will be dark, but the sky will light up nicely in your photos. After the blue hour comes the golden hour. It is the time of day where your subject basks in warm light. After the golden hour, the light becomes more bright and white, reaching its peak around 13:00 hours. Then the sun starts to set again. During sunset you first get the golden hour and after that another blue hour. It is best to practice landscape photography during the blue or golden hour! Remember this cycle:


Ofcourse it changes when you are in a forest or if it is cloudy.

Short summary:

- keep the horizon straight
- photograph when the light allows it
- check not only background but foreground as well
- check angles and axis


Well this was my fifth blog entry. I hope you enjoyed it and learned something from it. If you have any questions, please ask me (info@photojitsu.nl). For more photo’s and blogs you can check www.photojitsu.nl. I am also on facebook and twitter (see website for links) if you want to follow my work or this blog.

Thank you!


zaterdag 3 augustus 2013

Blog 4: HDR and selective colour

Blog 4: HDR en selective colour.

So here it is. My first blog post in English.
I get a lot of questions about my photographs. The most questions are about my HDR/Selective colour photos. In this blog post, I will explain how you make them.

HDR

HDR is an abbreviation for High Dynamic Range. It basically consists of at least three photo’s (five or seven is more common) that are placed on top of each other. The first photo is underexposed, the second photo has a normal exposure and the last one is overexposed (photo 1, 2 and 3 respectively).


These three photos are then processed using special software (Photoshop has a build in HDR script, see the photoshop manual on the website).  The light parts of the photo are taken from the underexposed photo because they hold the most detail. The dark parts of the photo (i.e. the shadows) are taken from the overexposed photo, again because they hold the most details. The rest of the photo is taken from the normal exposed photo. The result is photo 4.

 Photo 4:  High Dynamic Range photo.

Selective colour:
Now that we have our HDR photo, it is time to add the selective colour. Selective colour is the term that is used to describe two types of photos. The first is a photo/film in which only 1 colour is present (remember Schindlers List or more recently Sin City). It can also be used to describe a photo or a film in which certain parts are in colour, like in this photograph.

Using photoshop, we apply a black and white layer to the HDR photo.
Right, lets have a look at our photoshop screen (photo 5).


Press that little round icon, and select black and white. Ignore all the sliders that pop up.

Now just go to your brush, make sure the frontcolour is set to Black and use the brush to “paint” the parts of the photo that you want to have in colour (photo 6).


This technique is also more thoroughly described in my photoshop manual that you can find on the website.
Easy as that! I will close this blog with four examples of my own HDR/Selective colour photos. Hope you enjoy them!

If you read this blog and/or if you are going to use my photoshop manual make sure you drop me a line in my guestbook!

Why not join us on Facebook? www.facebook.com/photojistu .


Blog 15: The Orton Effect

The Orton effect One of the questions I get asked very often is; how come some of your photographs have such a dreamy look to them? Well...